
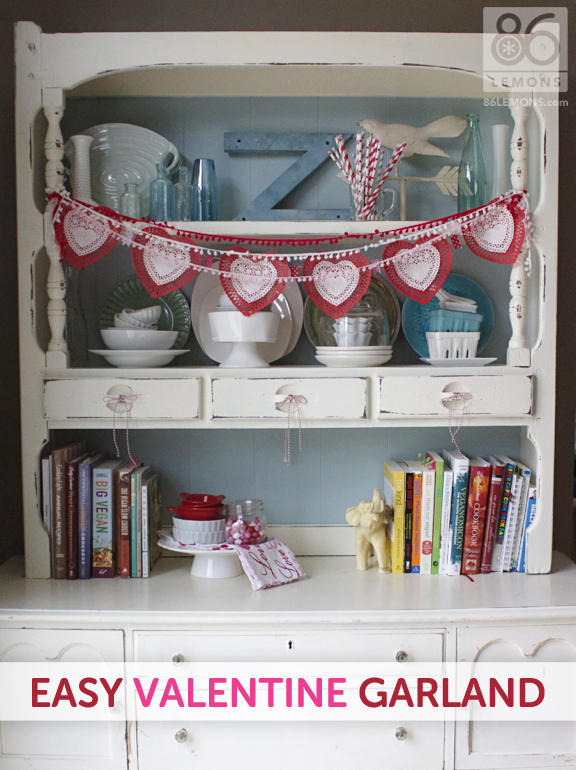
I have never once decorated for Valentine’s Day – until now. But now I have this hutch, this chalkboard, this white wreath and this centerpiece that all beg for festive adornment. It’s just so easy to add a few simple touches that I couldn’t resist. Besides, winter here in Michigan is drab and gray and depressing – who couldn’t use a little Valentine cheer?
If you’re thinking it’s a little early for Valentine decorations, you might be right. But here’s the thing – if you want to make this garland, you’ll need to go to Target NOW and pick up these paper lace hearts in the dollar bin. Another week and they’ll probably be gone. The other thing is Hubs and I will be gone over Valentine’s Day (we’ll be on a mission trip – YAY!! – in the Dominican Republic). If I waited til February to decorate, we wouldn’t get to enjoy it much.

MATERIALS:
paper lace hearts in 2 colors/sizes (from the dollar bin at Target)
baker’s twine or narrow ribbon
pom pom ribbon in red, pink and white (locals, I found this at Meijer on clearance in craft section for 1.49/roll)
scraps of paper, solid or pattern, in red/pink/white -or- Trendy Tape -or- Washi Tape

STEP 1:
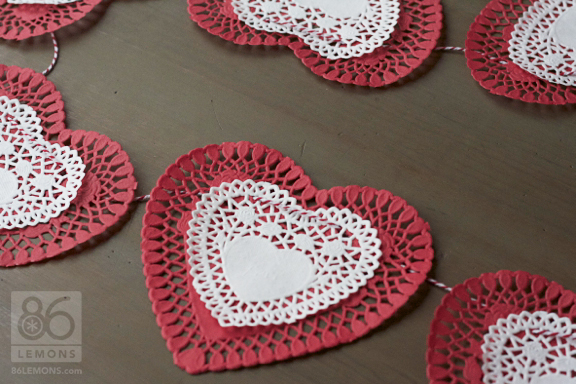
Lay small paper hearts on top of large paper hearts.
STEP 2:
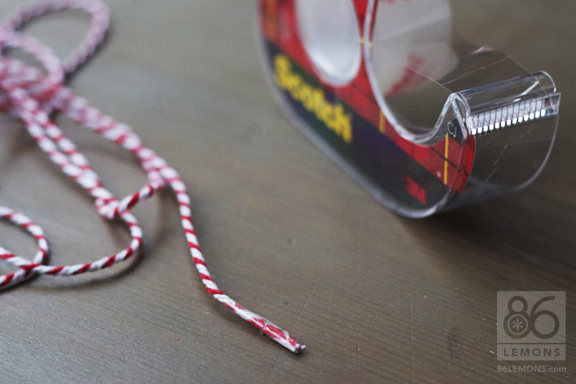
Use a small piece of tape to wrap the end of your twine or ribbon (like the end of a shoelace). This will make threading through the holes easier. Thread the twine or ribbon through both hearts (do this near the top so they will hang properly). Keep threading the double-layered paper hearts onto the twine (leaving an inch or so between each) until you reach the desired length of garland. Leave about 6″ of twine at either end for hanging the garland.
You could be finished at this step and simply hang the garland as is if you like.
STEP 3:
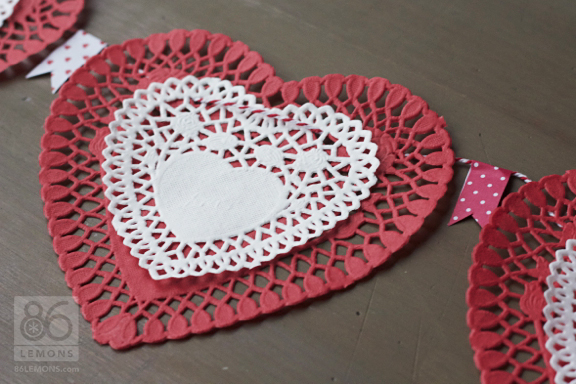
If using scrapbook paper, cut the paper into ½” wide strips about 3-4″ long. (If you want to go wider/longer, go for it). Fold in half over the twine (between two hearts) and use a dot of glue or small piece of double-stick tape to hold the two sides together. Cut out a small triangle from the end to create a flag shape. If using Trendy Tape or Washi Tape, simply cut a length of tape, fold it in half over the twine so it sticks together and cut out the triangle shape.
Repeat until each space between the hearts is filled with a “flag”.

STEP 4:
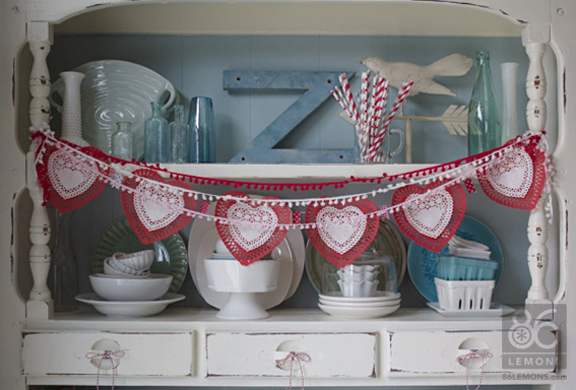
Hang the garland, allowing it to droop slightly in the middle. Cut the pom pom ribbons to similar lengths as the garland. Hang the pom pom ribbon over the paper heart ribbon as pictured above and below.
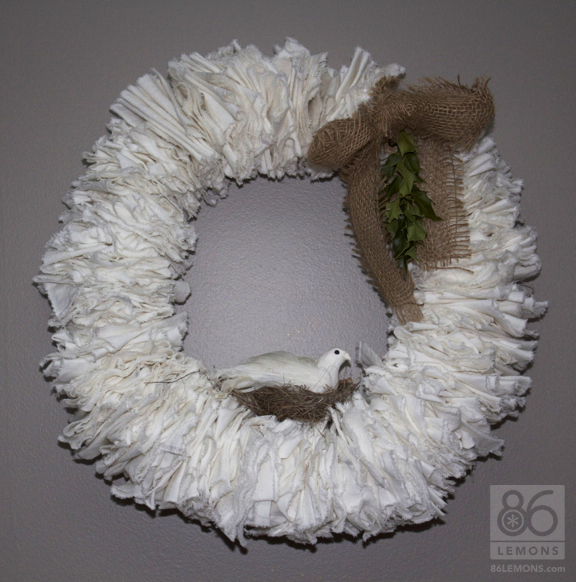
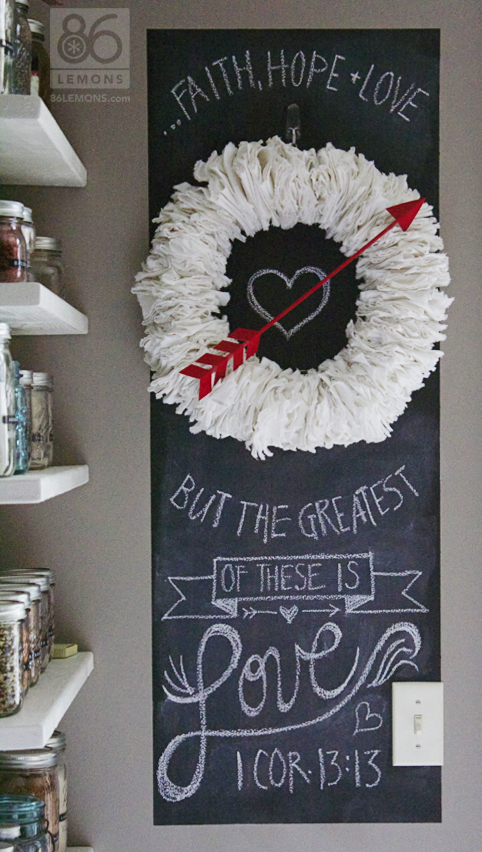
Remember the chalkboard area I recently added near my open pantry shelves? And the linen wreath I made? The wreath looked like this for Christmas:
Now it looks like this:
Remember my flea market find – the centerpiece thing? Now it looks like this:

I hope this inspires you to add some Valentine charm to your home! Have a great weekend everyone :) xoxo

Very sweet & cute and not too early at all! You might as well enjoy your hard work. :) LOVE the arrow on the white wreath and the verse on the chalkboard!!
Thanks Mindi! Do you decorate for V-day??
Very cute! I love how you were able to re-use all your fall & Christmas decorations and make them work for Valentine’s Day.
Livvy you are sooo creative….can’t wait to follow your blog!
Hi Melissa! Hope you’re doing well! Glad to have you here, thanks for reading :)
Cute! Excited about trying this garland! My girls will love this project…. I think I will hang it from that craptastic shelf I picked up at the auction last year. Speaking of which, let’s do that soon ok? We are in need of some craptastic accessories for the cafe/shop.
For sure – let’s do it!
Want to come decorate my house :) I am not interior design gifted!
Just as soon as I finish decorating my house ;)
All so cute!! LOVE your chalkboard and wreath very clever!
Hi.. awesome decor!!!
Where did u get those cute straws!!
I’ve picked up all different colors from different places here and there. I see that Meijer and Bed Bath and Beyond now carry them. Of course, you can always order online, too: http://amzn.to/XhT2Ss
I have seem so many neat projects with them i been looking for them forever!!
Thanks a bunch!!