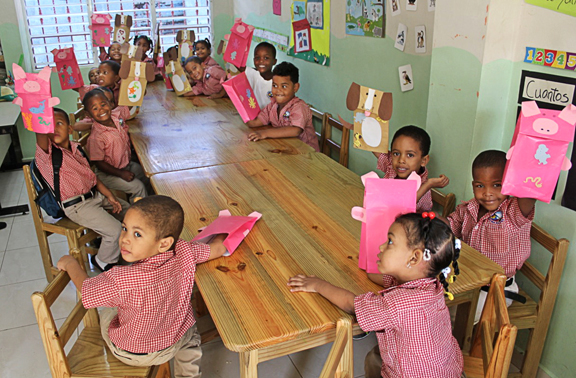
During my mission trip in the Dominican Republic, I had the opportunity to teach an art project to some of the school children.
I knew I would be doing this before we left, but I wasn’t certain what ages I would be working with. So I scoured Pinterest for ideas that would be suitable for ages 3 to 9.
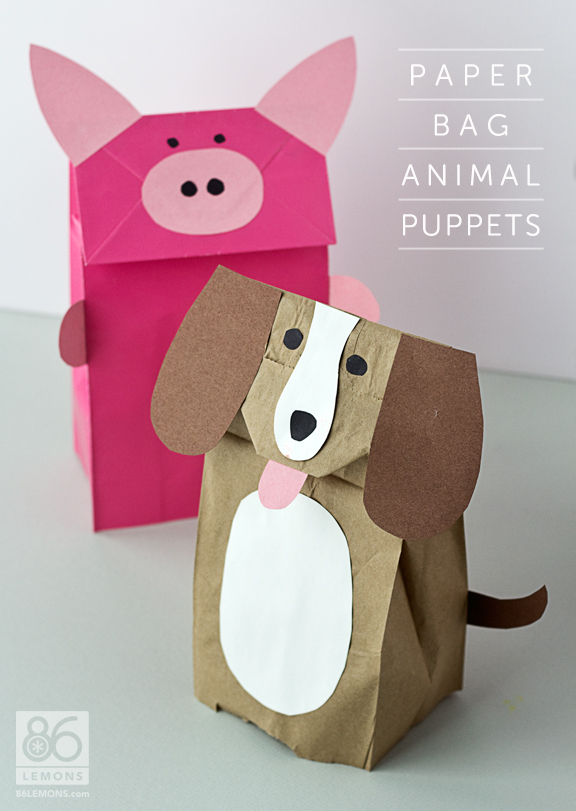
I finally settled on two projects – paper bag animal puppets and paper plate butterflies. Then I loaded up on art supplies to take along (and leave with the teachers).
As it turned out, we only had time for one project, so I chose the animal puppets. I may share tutorial photos of the other project with you another day, though now that I finished making the pups their home made dog bed.)
The original source for this project is the Martha Stewart site. Fortunately, I had the good sense to test the project before we left on our trip. I realized that, depending on their age, some children may need to have shape templates to trace and/or pre-cut shapes.
So before we left, I created a single sheet with all of the shapes for both the pig and the dog.
While we were there, I found out I would be working with 3 and 4-year old students, so we cut out all the shapes prior to class. Otherwise, I think this may have been a disaster. (Had I been working with older students, I would have let them cut out the template shapes on their own and trace them onto the construction paper.)
I also decided to use a marker for the eyes and nose instead of cutting out such tiny shapes from construction paper.
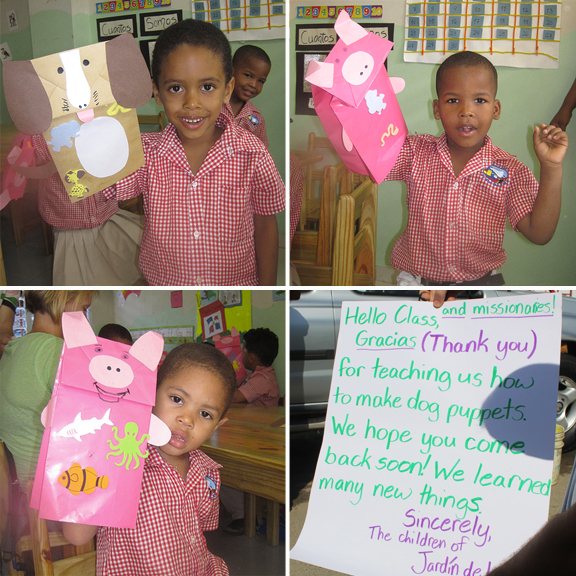
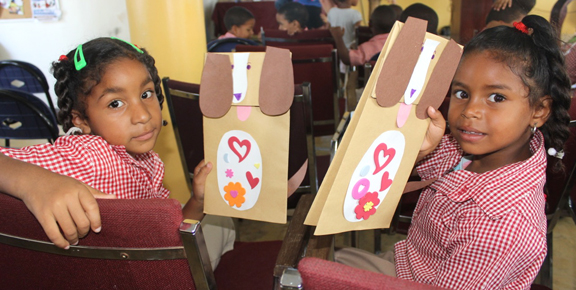
As you can see, the project went well and the kids seemed to love it. I also took along tons of custom vinyl stickers and let the kids have fun “personalizing” their puppets.

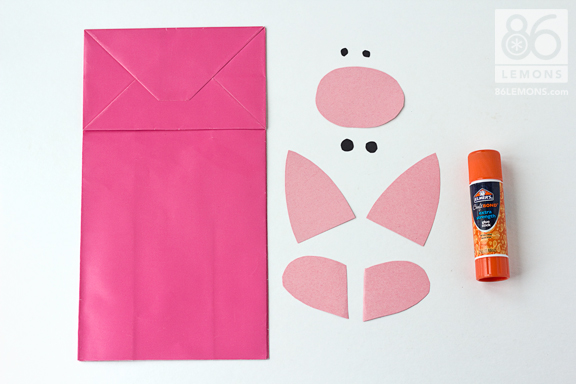
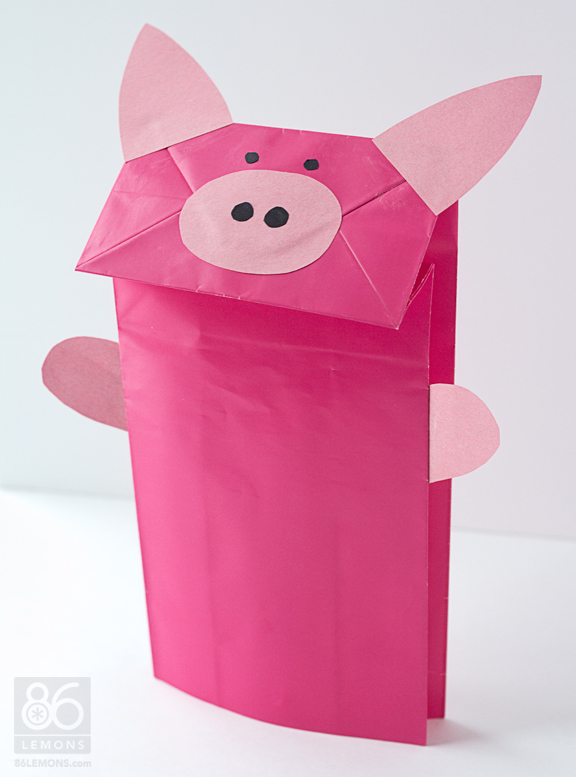
For the pig puppet, you will need:
1 pink paper bag (lunch bag size) – I found these at Hobby Lobby
1 sheet pink construction paper
1 sheet black construction paper (or a black Sharpie)
glue stick
scissors
template for ears, snout and arms (printed on card stock)
STEP ONE
Cut out shapes #6, #7 and #8 from the template sheet. Using the templates, trace two ears, two arms and one snout onto pink construction paper; cut out shapes. Optional – cut four small circles from the black construction paper for the eyes and nostrils.
STEP TWO
Glue the ears and snout to the bottom of the bag (the puppet’s face) in place as shown below. Glue the arms to the front half of the bag’s side pleats. Glue or draw eyes and nostrils in place.
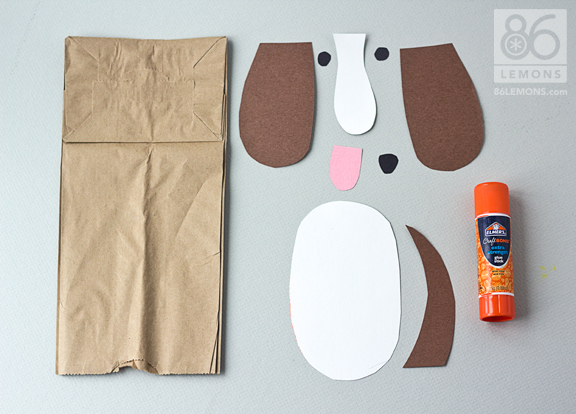
For the dog puppet, you will need:
1 light brown paper bag (lunch bag size) – You can find these just about anywhere, including the grocery store.
1 sheet pink construction paper
1 sheet white construction paper
1 sheet brown construction paper
1 sheet black construction paper (or a black Sharpie)
glue stick
scissors
template for ears, face, belly, and tail (printed on card stock)
STEP ONE
Cut out shapes #1 through #5 from the template sheet. Using the templates, trace two ears and one tail onto brown construction paper, one belly, and one face stripe onto white, one tongue onto pink.
Cut out shapes.
Optional – cut two small circles and one triangle (with round corners) from the black construction paper for the eyes and nose.
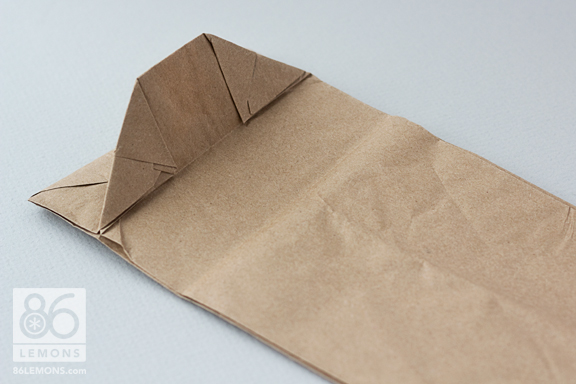
STEP TWO
Fold under the lower corners of the bag’s flattened bottom and glue. (This is optional. We chose to skip this step when working with the little ones.)
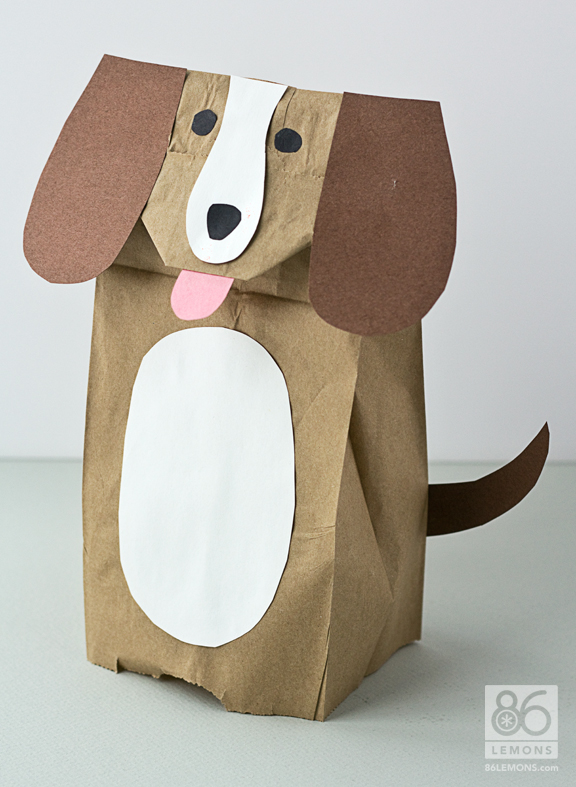
STEP THREE
Glue shapes in place as shown below, securing tongue under face and tail to the back of bag.
Fortunately, I had three helpers from our mission team, as well as two bi-lingual helpers from the Peace Corps (one of which was the class teacher). We let the kids choose to make a pig or a dog puppet, and we handed out just one or two shapes at a time.
Some students did their own gluing, and others needed help. I got a kick out of the kid who glued his dog ears on the opposite way so they were sticking straight up like a rabbit. Genius ;) To avoid marker mishaps, we also drew on the eyes and noses for most of them.
Hubs was one of my helpers, and I think he enjoyed it just as much as the kids! It was definitely a rewarding experience.
I don’t think the students there get to do many art projects, so this was a fun treat for them.
Hopefully, the supplies we left behind will enable the teachers to incorporate more art into the classroom. Let me know how it goes should you try this project with your little ones!

OMG, how cute are these? You were very smart to pre-cut all those shapes. I speak from experience when I say that, ha ha. I bet those kids had so much fun with that project! How very sweet and thoughtful of you to bring and leave extra supplies so they could make more projects after you left.
Hey Livvy,
I’m doing this with Ivan, my 7 year old who just joined the puppet team at church. They are supposed to make a puppet and I wasn’t even looking for a pattern when I saw this on pinterest. Too cute. He’s so excited and can’t wait to get started.
Perfect timing! I hope he enjoyed it :)
Hi Livvy!
I absolutely adore your blog and wanted to let you know that I have nominated you for a Liebster Award, a blog award from bloggers for bloggers. I’ll have a post up about it tomorrow (Monday) morning on my blog, Fitful Focus.It’ll be here: http://fitfulfocus.com/2013/02/23/its-a-major-award. Keep up the amazing posts :).
Nicole
Hi Nicole! Thank you so much, I’m honored. What a sweet gesture :)
So cute! Love it! Especially the photos with happy childrens faces! <3 :-)
These are adorbs! I remember making crafts similar to these in Sabbath School as a little girl. Love ’em! I loved that you used pink paper bags for the pig. We only ever used the brown, but pink is just SUCH a fun color. :)
Hi,
I think these paperbag puppets are adorable. I linked the pig one up on my blog as part of a round up of pig crafts related to reading Charlotte’s Web. You can check it out here: http://bookscraftsfun.blogspot.ca/2013/03/charlottes-web-crafting-some-pig.html
Thank you for sharing!
Made these with my son’s Kindergarten class last week and they turned out so cute. thanks for sharing!
Liz Stanley
Say Yes to Hoboken
Thank you so much for the template!!